A step-by-step guide to remotely control computers with TeamViewer For Pc

How to configure it
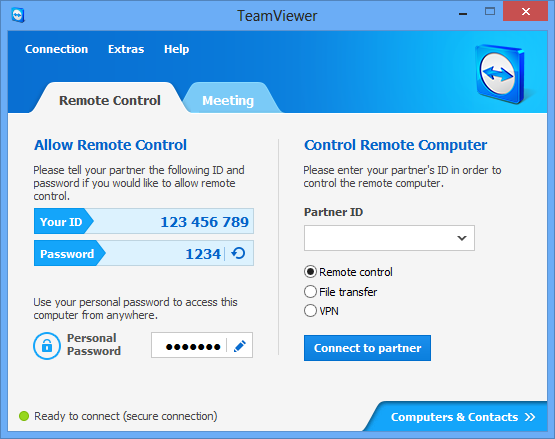
The way it works is very simple. To connect two computers you have to have TeamViewer installed on both. On the left side of the screen you’ll see that an access ID and password will have automatically been assigned to you. In order to be able to remotely access a computer, you’ll need its access details so you can type them into the Control a remote computer field. Type in the destination ID and tick the Remote Control option, and then when you click Connect to Partner a window will open where you see the desktop of the destination computer.
SEE ALSO: Open Camera: A great alternative for taking pics on Android
Unless the access password is manually refreshed (by clicking on the circular arrow icon on the start screen), you can gain access with the same credentials whenever you want to as long as TeamViewer is running on the remote device. If you wish, you can set the option for the program to launch whenever the computer starts.
Other features
Although I’ve explained how to control one PC from another, you can also do the same thing from your smartphone or tablet. By following exactly the same steps on the official Android or iOS app, you’ll have full access to remote devices with the added advantage of the mobility that these devices provide.But there’s more. If you access the Meeting tab from the start menu, you can create a private stream so that other users can see what is happening on your screen, ideal for creating tutorials or explanations. This feature is reinforced by the additional options to use your webcam, share files, or even use a virtual blackboard superimposed on the screen to make marks or annotations about what is happening on the screen.
LINK


No comments
Post a Comment